Kratzer aus Acrylglas entfernen
Mittwoch, 1. Juli 2020
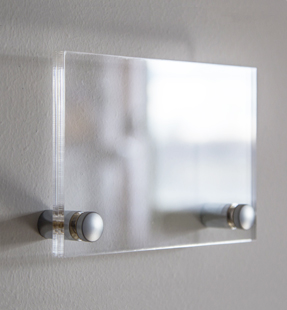 Die Kunststoffgläser (wie z.B. Acrylglas) sind in vielerlei Hinsicht echtem Glas überlegen. Sie lassen sich leicht verformen, haben ein geringeres Gewicht und brechen nicht so schnell wie Glas. Aber die Oberflächen können verkratzen. Zum Glück können Sie das Material polieren.
Tiefe der Kratzer
Sie sehen einen Kratzer, weil er eine Grenzfläche bildet, die nicht in der gleichen Ebene liegt wie die übrige Oberfläche. An dieser bricht das Licht anders als am Rest und auch die Reflexion ist unterschiedlich. Polieren heißt, dass Sie die störende Grenzfläche entfernen. Dies erreichen Sie, indem Sie das umliegende Material abtragen. Sie gleichen also die Oberfläche an die Vertiefung des Kratzers an.Ab einer gewissen Tiefe müssten Sie sehr viel Material abtragen, um den Kratzer unsichtbar zu machen. Auch besteht die Gefahr, dass Sie eine Delle in das Material polieren. Diese Unebenheit ist zwar weniger deutlich zu erkennen als ein Kratzer, aber die wellige Oberfläche ist sehr störend. Dies gilt besonders, wenn die Acrylglasfläche ein Bild oder eine Schrift bedeckt. Es entsteht an einigen Stellen ein Lupeneffekt, die Buchstaben wirken daher unregelmäßig.
Einen Richtwert wie tief ein Kratzer sein darf, den Sie problemlos auspolieren können, gibt es nicht. Fahren Sie mit dem Fingernagel sanft über die Oberfläche. Wenn Sie den Kratzer dabei spüren, ist er zu tief, um ihn zu polieren.
Auffüllen ist manchmal möglich
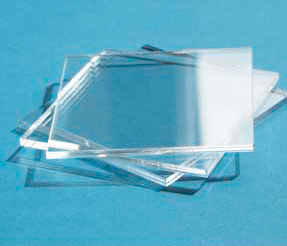
Lichthärtende Kleber auf Acrylatbasis eignen sich perfekt, um tiefe Kratzer zu verfüllen. Die Mittel haben einen fast identischen Lichtbrechungsindex und greifen Acrylglas nicht an. Es besteht daher nicht die Gefahr, dass sich das Material eintrübt, wie es bei lösungsmittelhaltigen Klebern geschehen kann. Zur Sicherheit sollten Sie aber immer eine Probe an einer versteckten Stelle machen.Die Kleber benötigen UV-Licht, um auszuhärten und sollten während des Härtens durch eine Offsetfolie oder Folien für Laserdrucker abgedeckt werden. Wenn Sie das Teil nicht der Sonne aussetzen können, benötigen Sie eine UV-Lampe.
Perfekt sind Kleber mit einer sehr geringen Viskosität, damit sie gut in die Beschädigung einfließen können.
1. Geben Sie einen Tropfen auf die Reparaturstelle und decken Sie diese mit einem Stück Folie ab.
2. Härten Sie den Kleber mit UV-Licht einige Minuten.
3. Ziehen Sie die Folie ab.
4. Fahren Sie vorsichtig mit einer Abziehklinge über die Reparaturstelle.
Nun müssen Sie die gesamte Scheibe polieren.

Zahnpasta oder Spezialpolitur?
Sie finden im Internet immer wieder Anleitungen, wie Sie mit Zahnpasta eine Acrylglasscheibe polieren können. Diese Methode ist sicher billig, aber das Ergebnis ist selten zufriedenstellend. Meist erschwert es eine professionelle Politur, denn es können zusätzliche Kratzer entstehen.Die Kunst beim Polieren ist der richtige Materialabtrag. Grobe Schleifpartikel entfernen viel Material, aber sie hinterlassen Spuren. Sehr feine Mittel entfernen kaum Material, aber sie eignen sich, die Spuren zu beseitigen, die das gröbere Schleifmittel hinterließ.
Gegen Zahnpasta sprechen drei Argumente:
- Die Härte der Schleifpartikel ist auf Zähne abgestimmt, nicht auf Kunststoff.
- Sie wissen nicht, wie grob die Schleifpartikel sind.
- Sie können nicht abgestuft von grob nach fein polieren.
Perfekt für Acrylglas sind Schleifpasten in Blockform, die es in verschiedenen Abstufungen gibt.
Womit Acrylglas polieren
Sie können mit der Hand oder mit einer elektrischen Schleifmaschine polieren. Verwenden Sie keine Bandschleifer, Winkelschleifer oder rotierenden Schleifmaschinen, sondern eine sogenannte Exzenter-Poliermaschine. Die Polierscheibe bewegt sich auf einer elliptischen Bahn, statt zu rotieren. Das verhindert, dass Sie kreisrunde Polierspuren hinterlassen.Richten Sie sich bei der Wahl der Polierscheibe nach den Angaben des Poliermittelherstellers. Dieser hat in Tests ermittelt, mit welchem Material Sie das beste Ergebnis erzielen.

Der Poliervorgang
Polieren mit der Maschine
Wichtig: Halten Sie den Schleifteller grade, damit er nicht verkantet.1. Beginnen Sie mit grober Polierpaste.
2. Geben Sie etwas davon auf die Polierscheibe.
3. Stellen Sie eine geringe Drehzahl ein, um die Paste auf dem Acrylglas ohne Druck zu verteilen.
4. Erhöhen Sie die Drehzahl. Bewegen Sie den Polierteller in waagerechten Bahnen mit leichtem Druck. Die Bahnen sollen sich etwa zur Hälfte überlappen.
5. Wiederholen Sie Schritt 4, aber fahren Sie nun senkrechte Bahnen.
6. Wechseln Sie zu einer feineren Polierpaste und beginnen Sie mit Schritt 1.
Polieren von Hand
Die Abläufe sind identisch wie beim Polieren mit der Maschine. Verwenden Sie einen weichen Lappen statt einer Polierscheibe.Führen Sie kreisende Bewegung entlang der Bahnen aus. Vermeiden Sie, auf einer Stelle mehrfach zu kreisen.
Egal, ob Sie vom Hand oder mit der Maschine polieren - üben Sie nie zu starken Druck aus und bewegen Sie sich immer in Bahnen über die gesamte Scheibe. Versuchen Sie nicht, die Stellen mit dem Kratzer einer Sonderbehandlung zu unterziehen.
